• Warning Icons on the Player

    January 19, 2021 Administrator Tech FAQs

    There are two types of warning icons that can appear in the right-hand corner of the screen when the Player is not functioning optimally.

    Let’s have a look at their significance and how you can troubleshoot:

    1. Lightning / Thunderbolt / Thunder Icon


    This is an indication that the power supply is unstable, the player is under-powered and this situation could lead to corruption of the SD card and overall instability. It would be best, in this case, to switch to a new power adapter as soon as possible.

    • Raspberry Pi 2 needs a 5V/2A power adapter
    • Raspberry Pi 3B and 3B+ needs a 5V/2.5A power adapter
    • Raspberry Pi 4 needs a 5V/3A power adapter


    2. Temperature / Thermometer Icons


    The thermometer icons mean that the Player’s main chip is hotter than normal.

    The half-red thermometer icon means that the Player’s chip temperature is between 80 and 85℃ and the Player will throttle the CPU (decreasing performance) in an effort to keep the temperature below 80℃.

    The completely red thermometer icon means that the Player’s chip temperature is above 85’C and the Player will throttle both the CPU and GPU (decreasing performance even further) in an effort to keep the temperature below 85℃.

    Why the overheating? Most probably, content pushed to players is somehow too “heavy”. You might not realize it, but adding too many Playlists, or transparent content, might put too much of a burden on the Player.

    What can you do? Here are some possible remedies:

    • Try removing some content, combine multiple Widgets into single Widgets, or reach out to our support team and ask for help in order to optimize your Show or content in general.
    • Add a passive heat-sink. They are really cheap. Note that our Playboxes come pre-installed with a heat-sink (US warehouse only).
    http://www.ebay.com/sch/i.html?_from=R40&_sacat=0&LH_BIN=1&_nkw=raspberry+heatsink&_sop=15
    • Try using a metal case instead of a plastic one. If using a case with a cover (like the Official Raspberry Pi case we ship over with our Playboxes), try removing the cover to allow the chip to cool.
    • Place the Player in a well-ventilated space.


    You can override standard behavior and disable both icons. Make sure that you understand the risks of doing so.

    • Go to the “Monitors” list and edit the monitor in question.
    • Click on the “Advanced” tab.
    • Make sure the “Allow Raspberry config.txt Override” toggle is set to “ON”.
    • In the “Raspberry config.txt Override Directives” text area, you will have to enter the following configuration line:
      avoid_warnings=1
    • After you are finished, click the “Save” button.
    • The Player will reboot, and you are set to go.

    Keep in mind that we do not recommend that you just remove the warning icons without troubleshooting. You should investigate and remedy the issue, rather than ignore the warnings.

  • Setting a Web Page to refresh

    January 15, 2021 Administrator Tech FAQs

    When you add a single Web Page to a Show, the Web Page will not refresh. The same thing happens with a Playlist with a single Web Page in it. This is by design, since many Web Pages need to be shown constantly.

    To refresh a Web Page, you must create a Playlist and add the Web Page twice, with the same duration. This will cause the Player to reload the Web Page at each interval*.

    IMPORTANT: If you refresh a page too often, the website might block your IP. Set a duration that matches your needs. We suggest a minimum of 60″ refresh time. Also, account for ALL the Players that will be loading this Web Page. Your IP or whole system might be blocked if you load content too fast from a third-party website.


    *Note that content is pre-loaded, to make transitions more smooth. So, the next Web Page entry in the Playlist starts to load in the background, as soon as the previous entry has been shown on screen.

  • Reset all Settings on your Player

    January 15, 2021 Administrator Tech FAQs

    To reset all Settings on you Player, you need to delete a file from the SD card of the Player. This will force the system to apply the default settings.

    IMPORTANT: Keep in mind that if your Player requires some special network configuration in order to get online, you will lose Internet connectivity. This might render the Player unreachable and you might end up going on-site and performing manual configuration.

    For Regular Users

    1. Power off your Player (by removing the power cable).
    2. Remove the microSD card from your Player.
    3. Access the microSD card with your PC. You might need a microSD-to-SD card adapter, or a USB memory card reader.
    4. You will see one or more storage filesystems. On the first one (the smallest, around 100MB of space), you will find a file called “SETTINGS.txt”.
    5. Delete the “SETTINGS.txt” file.
    6. Remove the microSD card from your PC.
    7. Place the microSD card into your Player.
    8. Power on your Player.

    Upon start-up, the Player will apply all default settings to the system. It may require up to 10 minutes and a reboot might occur.

    For Advanced Users


    If you have remote (SSH) or local shell access, just issue these two commands:

    sudo rm -f /boot/SETTINGS.*
    sudo reboot  Upon start-up, the Player will apply all default settings to the system. It may require up to 10 minutes and a reboot might occur.  

  • Recovering your Player through a USB flash drive

    January 15, 2021 Administrator Tech FAQs

    The Xandabox is resilient to hardware and system failures. But, as with all devices, there is a slight chance that the Player may fail.

    In case of a software failure, you might be able to recover your Playbox through “reflashing” it with the latest Xandadeck software. Reflashing will erase all of contents inside the Playbox (re-writing the whole SD card from scratch). Your settings will be retained, so your Playbox should re-apply all settings in the system, re-download all content required and resume playback without you doing anything.

    If you are an advanced user, keep in mind that the only thing retained from the existing contents is the “SETTINGS.txt” file containing all settings. Any manual changes you have made into to the image through the command line will be lost (e.g. manually changing passwords, changing config.txt manually, adding other software, etc).

    Resetting Settings before Recovery


    The recovery procedure retains your Player’s settings. If you wish to remove settings, you can also follow this guide before following the Recovery procedure.

    Preparing a USB flash drive


    To perform this procedure, you will be needing a USB flash drive. Here are the requirements and some info on this:

    • It would be best to use a FAT32-formatted flash drive (most USB flash drives are by default formatted as FAT32). ext2/3/4 also works, and NTFS might also work.
    • The Xandabox does not change anything on the flash drive, so you can leave any other files you have on the stick.
    • Download the latest Xandabox Image zip file (about 700MB in size).
    • DO NOT RENAME OR EXTRACT THE ZIP FILE! Copy it (as it is) into the base folder of the USB flash drive.

    IMPORTANT: Some flash drives may not work properly. During start-up, the USB flash drive might not start quickly enough, so it might not be functional within the first seconds of the startup procedure, so Xandadeck cannot detect it. This case is detailed below. If that is the case with your flash drive, try a flash drive of different make/model and find one that works

    Reflashing your Player


    After you have prepared a USB flash drive, follow these instructions to recover your Playbox:

    1. Plug the USB flash drive into the Playbox.
    2. Power up (or reboot) the Playbox.
    3. Upon start-up, and before showing the Xandadeck logo, the Playbox always displays a message that says Searching for USB drives…” while searching for the flash drive.
    4. If the Playbox finds the flash drive, it should display a message saying “USB drive detected”.
    5. If the Playbox does not show the “USB drive detected” message, then you will need to use a different USB flash drive because the Playbox cannot detect the flash drive you used.
    6. If you have correctly prepared the USB flash drive as described above, the verification and writing procedure should start. If you get any error message, check that you have properly prepared the USB flash drive.
    7. At this point, DO NOT POWER OFF YOUR PLAYBOX! Also, do not remove the USB flash drive! Allow the procedure at least 30′ to complete.
    8. When the procedure has been completed, you will be prompted to remove the USB drive. Once you remove it, the Playbox will automatically reboot.
    9. After reboot, the Playbox will re-apply all retained settings in the system.
    10. The software might also need to be updated online, so make sure you do not remove power from the Playbox to ensure everything goes smoothly.
    11. Please allow enough time to make all the required initialization procedures. Allow at least 15-20 minutes before worrying if nothing shows up on screen.

    After the procedure is completed, you Player should recover, connect to the Internet, and start downloading content. Eventually, it will start playback.

    Security Notice

    For the advanced IT security-aware readers:

    Xandabox Image files are digitally signed. The ZIP files contain information that verify that the specific SD card image was issued by Xandadeck. You cannot perform this procedure with an arbitrary image file, so an attacker cannot inject their own code into the system just by plugging in a USB drive and rebooting.

  • Does Xandadeck support authenticating on a web page?

    January 15, 2021 Administrator Tech FAQs

    A website may require authentication to access a specific URL. Usually, authentication is implemented using two different ways:

    • HTTP Basic Authentication
    • Form-based Authentication, using sessions (cookies)

    HTTP Basic Authentication


    If the authentication is based on HTTP Basic Authentication, then you can provide the username and password within the URL on the Web Page in Xandadeck, like:

    http://USERNAME:[email protected]/path/to/your/page.php

    Try out the following test link in Xandadeck to verify it:

    https://user:[email protected]/basic-auth/user/passwd

    Form-based Authentication


    If the authentication is based on login forms and sessions/cookies, then you will be able to use our scripting engine to login and navigate to the page you need. Here is the documentation on our web scripting engine.

  • What hardware players does Xandadeck support for playback?

    January 15, 2021 Administrator Tech FAQs

    You have three options:

    • We have our very own Xandabox. Xandabox you order are shipped ready-to-use, with everything pre-configured. See the Xandabox articles for more details.
    • We support the Raspberry Pi, a very low cost but quite capable mini-computer which you can buy yourself from vendors worldwide, no matter where you are located. Check out the guide for setting up a Pi yourself.
    • ONLY for special projects with thousands of screens we can also support using regular PCs. Note that the PC must be fully utilized for Xandadeck and must run Ubuntu LTS. No Windows support yet, sorry. Reach out for more info.

    (Note 1: Actually, our Xandabox is based on the Raspberry Pi and a bunch of additional components, but at a discounted price compared to a DIY solution. So, why bother? Just get your FREE Xandabox with an annual plan.)

    (Note 2: Non-PC hardware running Ubuntu LTS 14.04 might also work.)

  • QSR + Digital Signage Displays = The Ultimate Happy Meal

    Walking into a quick-service restaurant these days often means seeing a row of digital signage displays behind the counter, as LCD screens rapidly replace static back-lit posters.
    With an estimated 50 to 70 percent of QSR sales occurring in the drive-thru, taking digital menu boards outdoors is the next logical evolution for the industry. A report by Futuresource Consulting in 2014 suggested that only 1 percent of the potential market for outdoor displays had so far been tapped.

    As a reminder of why the drive-thru is important, much of Australia’s eastern seaboard recently copped an unseasonal lashing from the weather gods. As the rain pelted down, the number of drive-thru QSR customers surged as they avoided the drenching that comes from the 100-meter parking lot dash.

    The drive-thru customer experience is all about speed and convenience. Having the right menu and message at the right time is important. In the past, business owners had two choices: Display all menu items — breakfast, lunch and dinner — on the one menu board all day long, or use two-sided menu boards that could be flipped during the day. Talk about overwhelming the customer.

    The National Restaurant Association’s 2015 Industry Forecast showed 41 percent of the critical 18- to 34-year-old target demographic says technology is an important factor when they choose a restaurant, and the next age bracket — 35 to 44 years — wasn’t far behind at 39 percent. The NRA’s research found that technology improves speed and convenience for consumers.The restaurant is filled with digital signage advertising machine – playing your product more able to attract your customers.

  • The function of Outdoor lcd digital signage

    Digital signage is a part and parcel of the modern advertising. The sophisticated silver casting works as an interactive medium for the public since it showcases the multimedia content that needs mass attention. No one can negate the importance of digital signage for effective marketing. Serious business ventures use digital signage as their triumph card to outclass competitors. We take pride in announcing our unmatched service in the field of the LCD display. We master the industry norms thoroughly.

    Robust advertising via outdoor digital Signage

    From pixel range to physical makeup of the signage every bit count to make the marketing strategy successful. Researchers suggest that good visuals and aesthetics play a vital role in converting potential customers to actual customers. So, the vital statistics of screens definitely play an essential part. Panel brand, its display size coupled with display ratio, viewing angle and resolution are the core pillars of an extraordinary display. Further enhancements are done via viewing angle and adjusting contrast, color, and brightness. LED backlit is great for energy conservation. Since outdoor digital signage needs to be continually run energy efficient mechanism to run the digital signage is the foremost prerequisite.

    Effective operation

    Operation and execution of our digital signage are efficient and reliable. Offering connection to the network along with touch screen, infrared touch screen touch ways, and touch dots. Android 4.2 version is embedded that is upgradable. Power, voltage, and stability are other parameters that make this outdoor digital signage incredible and versatile product. Our product works well with the 3G/4G network.

    Weather resistant

    Our digital signage work equally well in extreme sunny, windy or rainy seasons. The surface comprises of aluminum alloy or tempered glass to instil more durability and resistance. The galvanized steel sheet measures 1.0-1.5mm in thickness.

    Customization

    We owe a list of loyal customers that prefer us for our customization expertise. Besides conventional white, silver or black colors we customize the digital signage in any color or theme our vendors demand. We also take immense care of packing by ensuring the product remains waterproof, dust-proof and anti-dazzle.

    Quality assurance

    Outdoor digital signage and all other products are duly certified in accordance with the protocols of CE, ROHS, FCC, ISO, and IP65.

    We require a small time span of 15-30 days to complete the delivery. We feel great to respond your queries so if any question pops in your mind feel free to contact us anytime.

  • Direct view LED Displays for Digital Signage: Pros & Cons

    You’ve got to know your screen tech if you want to deploy the right digital signage solution for your use-case. And all these options out there can easily confuse the best of us. But have no fear, we’re here to give you a crash-course on the most popular screens. Starting with direct view LED displays.

    Get the lowdown on direct view LED displays

    If you use digital signage, you need a screen to show off all your awesome content. And that screen’s got to pull its own weight and actually deliver on the image quality you need. Make no mistake, the type of screen tech you choose has a lot to do with how you want to display digital signage content. You can’t just pick any old screen and hope it works just as well for stadium-level setups and end of aisle signage. So where do direct view LED displays excel? It’s all about the tech details.

    All the tech explained

    Direct view LED displays run on tiny little powerhouses called light-emitting diodes (LEDs). Each LED is a small semiconductor that takes the electricity running through the screen once it’s plugged in and transforms it into light. Additionally, each one contains a specific chemical compound that defines whether it’ll produce the blue, red or green colors you need for great images and videos.

    Why? Because you need one light-emitting diode of each color to create a full-color pixel. You know, those pesky little squares you see on screen that together make up the whole image. And when something goes wrong they go all blocky like you’re looking at a computer screen from the ‘80s. In fact, that’s exactly why you need to know precisely what kind of light-emitting diode tech you need for your digital signage. Because you want people to notice your attention-grabbing content, not your boxy pixels. And pixels are unquestionably important because red, blue and green make up the light-based primary colors human eye sensors pick up. And in turn, these three primary colors taken together allow the light-emitting diode to produce up to 281 trillion colors in each pixel. Talk about attention-grabbing eye-candy!

    Putting the direct in view LED displays

    Why are LED displays called direct view LED displays? And what does that have to do with image quality and use cases? Firstly, it’s got a lot to do with how LCD displays rely on light-emitting diodes for light (more on LCD displays in another post). In LCD screens two polarized glass panes trap liquid crystals that move when an electric current zaps through them. As the liquid crystals shift around, light passes through to form an image on screen. Secondly, LCD screens don’t generate their own light. And that’s exactly where light-emitting diodes step in. They provide the backlight in LCD displays that’s necessary to light up the image.

    Unlike with LCD displays, in direct view LED displays, it’s the light-emitting diodes themselves that formulate the image – no more playing second fiddle by serving as a plain old backlight. Light-emitting diodes get affixed to the panel and boom, images appear. So basically you’re “directly viewing” the image on screen because of the light-emitting diodes in direct-view LED displays – no liquid crystal or polarized glass necessary.

    Direct view LED displays can either use discrete oval LEDs which are basically one single self-contained diode, or SMD LEDs. Surface Mounted Device LEDs contain 3 individual light-emitting diodes bunched together. Either way, it’s the light-emitting diodes that create the images you see on screen.

    But will your content display just as well on a direct view LED display as it does on your traditional LCD display? You’ll have to check out the pixel pitch.

    How does pixel pitch affect direct view LEDs?

    Basically, pixel pitch refers to the distance between each LED pixel. If there isn’t much space between light-emitting diode pixels, you’ve got more of them making up your direct view LED display. Also, the more LED pixels you’ve got (meaning there’s less space between them, increasing their density), the better your image resolution. Your images and videos will be clearer, crisper, more defined. In fact, if your pixel pitch is small (aka fine pitch), your viewers can step right up to the screen and see all the interesting little details in your videos and images. All because you’ve got a higher pixel density.

    However, if the space between pixels is larger (meaning there’s a higher pixel pitch and a lower pixel density on screen) you’ll get that blocky effect when watching the screen up close. Pixel pitch varies, going from 0.8mm to 10mm+, so you’ve got a wide range to work with.

    How does that affect you? It depends on how you want to use your direct view LED display. If you’re planning on setting up your screens indoors where people can get up close and personal with them, choose a smaller pixel pitch. You’ll want less distance between pixels in order to keep your videos and images crisp and sharp even if they walk right up to your screen. If your viewers will be farther away from your screens, a higher pixel pitch will do.

    In brief, your rule of thumb is the following. The closer people get to your screen, the smaller the pixel pitch should be to maintain a great image quality. Are you planning big installations, like outdoor billboards? Higher pixel pitch is exactly what you need. People won’t get close enough to notice those gaps between LED pixels.

    Why choose direct view LEDs for digital signage?

    Direct view LED displays offer many advantages. This technology means you get brighter, high-contrast images and videos compared to traditional LCD displays. And that’s so important for your digital signage. In fact, because of their extreme brightness, direct view LED displays work great in situations and places that are already very brightly lit. Offices, schools and shopping malls are just a few examples. In addition, these screens offer unparalleled color quality.

    Also, direct view LED displays give you seamless video walls. Why? Because they don’t need bezels (frames surrounding the screen) like LCD screens. So your installation looks sleek and professional. Indeed, if you have unusual specifications when it comes to screen size, direct view displays are your best bet. In fact, they come in all sizes, including huge screens for outdoor digital signage installations. If you require custom screen sizes, you’ll benefit from choosing direct view LED displays because of their flexibility.

    What use cases need direct view LED displays?

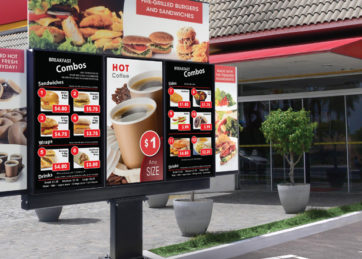
    Direct view LED displays work great for outdoor or larger installations. Because they’re extra-bright, colorful and come in all sizes, they beat LCD displays right out of the gate. The image quality’s tailored to use cases that target large numbers of viewers. If you need to set up screens in high traffic areas like shopping malls, airports, convention centers, universities and schools, direct view screens have been tried and tested. Planning a video wall or billboard somewhere huge, like sports arenas, school stadiums, cineplexes and entertainment centers? This type of screen tech won’t let you down.

    As direct view LED displays handle videos, images and tickers equally well for high-traffic areas, you won’t have any limitations when it comes to creating digital signage content. Plus, as you don’t need fine pitch displays since your viewers will see content from a distance, the price is most definitely right.

    Direct view LED displays in a nutshell

    There are many benefits to using direct view LED displays to show off your content. If your digital signage involves high traffic areas, video walls, large or customized screen sizes and people seeing your content from a distance, direct view LED displays get the most bang for your buck. In fact, these displays are a very popular choice when installing digital signage screens in busy places like schools, universities, airports, malls, convention centers and stadiums. You’ll get that image brightness and crispness you’ll need to attract and hold the attention of hundreds of people as they stream by. Plus, they’ll get all the information they expect from you, at a glance, with an excellent image quality to boot.

    Of course, you could always choose a fine pitch LED display for up-close indoor use. That would give you the same level of color, brightness and contrast from the light-emitting diode pixel technology. Even if people walk up and touch your screens. No limitations there if you trust a fine pitch display. But it could hit your wallet pretty hard if you haven’t budgeted for it. However, more and more manufacturers offer fine pitch displays, and it’s an option that’s definitely worth considering.